Become an insider!
Get our latest payroll and small business articles sent straight to your inbox.
In this Article:

When it comes to the unique needs of your business, payroll software features can make or break which platform you choose. It can be a lifesaver or a time-drainer, and we all know which side of the payroll solution coin we’d rather be on.
Good payroll software? It gives you the expertise of managing payroll without having to be an expert yourself.
Benefits of payroll software.
There are a number of benefits of payroll software, but here are a few of the key ones.
Automates routine tasks
Payroll software automates repetitive tasks such as wage management, calculating pay, payroll taxes, maintaining records, payments on pay day and generating payroll reports.
Saves time and money
Automating the payroll process frees up your time to focus on growing your business (or whatever else strikes your fancy!). Plus, using software to run payroll eliminates needing to hire a giant payroll or human resources department to handle all the manual tasks.
Enhances efficient tracking
Automation syncs employee data, giving you access to it in one place. You can easily track hourly wages, absences, vacations, hours worked and more.
Minimizes errors
Statistics indicate that 49% of employees are likely to look for a new job after experiencing two pay cheque errors. A good software solution reduces the likelihood of human error and, in this case, potentially employee satisfaction, too.
Enhances employee engagement
An automated payroll system that also has an employee self-service portal empowers workers to manage and review their data as well as access year-end tax forms and pay stubs.
Supports compliance
Most payroll solutions are automatically updated with the current regulations to follow tax laws, enhancing regulatory compliance.
Key features of payroll software.
There’s no question: Payroll automation makes life easier for business owners. However, you need a payroll system with the right features to make the most of it. Below are the essential payroll software features to look out for.
1. Automated payroll processing.
When looking for a payroll solution, look for one that makes your payroll runs simpler by automating key processes such as:
- Entering hours
- Wage and tax deduction calculations
- General payroll management
Automated calculations
When we say automated calculations, we don’t just mean for employee wages and the standard minimum wage calculations. Those are just the bare minimum when it comes to automated calculations.
We also mean custom income and deduction codes, tax deductions, workers’ compensation, stat holidays and even something like mid-cycle pay changes. AKA eliminating as much manual payroll management as humanly possible and completing payroll in just a few steps.

Direct deposit
Direct deposit eliminates the time-consuming cheque writing process by sending employee earnings directly to their bank accounts. The direct deposit information you’ll need from your employees includes their bank account number, transit number and some other details that they can provide you via a void cheque or direct deposit form. Then, once it’s set up, it’s smooth sailing each pay day.
Compliance
Compliance is one area that often scares those handling payroll processes. There are a number of rules and requirements set out by both the federal and provincial governments, such as specific tax calculations or even vacation accrual and overtime earnings. The best payroll software systems have it built into the platform to be compliant and update whenever new compliance rules are introduced.
2. Payroll tax remittance filing and management.
The next step in handling payroll taxes is filing them with the government, which can be almost as stressful as calculating them. Having a payroll management system that has the ability to take care of tax withholdings on your behalf lightens the load. It’s especially great when it’s included as a part of the process without any additional fees.
It’ll do this by generating the proper forms and information to send to the Canada Revenue Agency and then submit the forms on your behalf. Some payroll software will even allow you to pay your payroll taxes automatically directly through the platform.
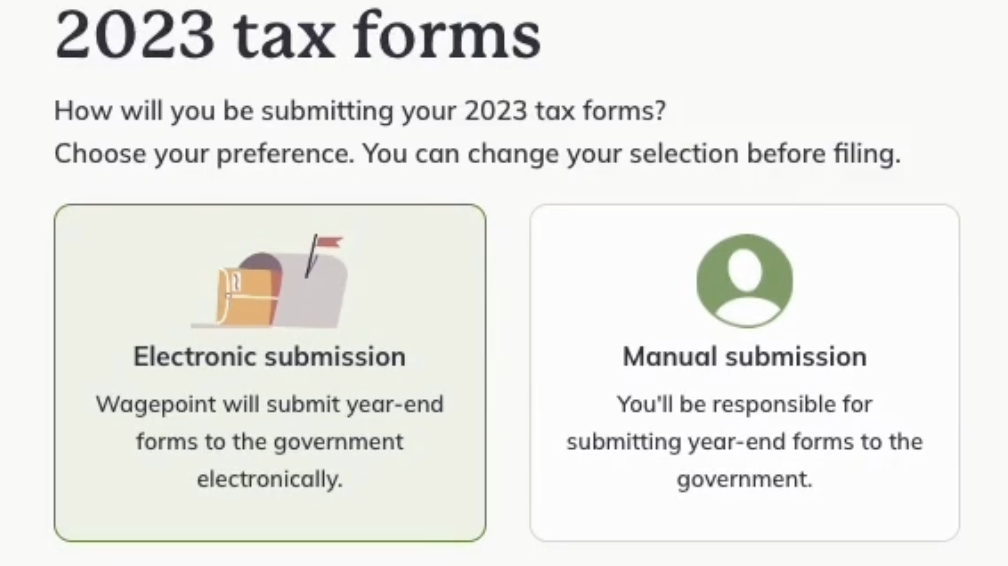
These tax filing features can save a ton of time and headaches throughout the year and especially come year-end when you have forms like T4s, T4As, RL-1s and their related summary reports to file.
3. Payroll for employees and contractors.
Calculating wages for employees and independent contractors isn’t the same. With different regulations to follow, this impacts things like tax deductions, benefits and more. If employees and contractors make up your workforce (which can be the case for many small businesses), running payroll for both can be hectic.
A payroll management software that handles both of these types of workers is a valuable asset. It takes the hassle out of calculating wages for employees as well as any contractors you’ve brought aboard. It’ll also ensure that you meet the specific requirements and have the appropriate forms to give them at year-end.
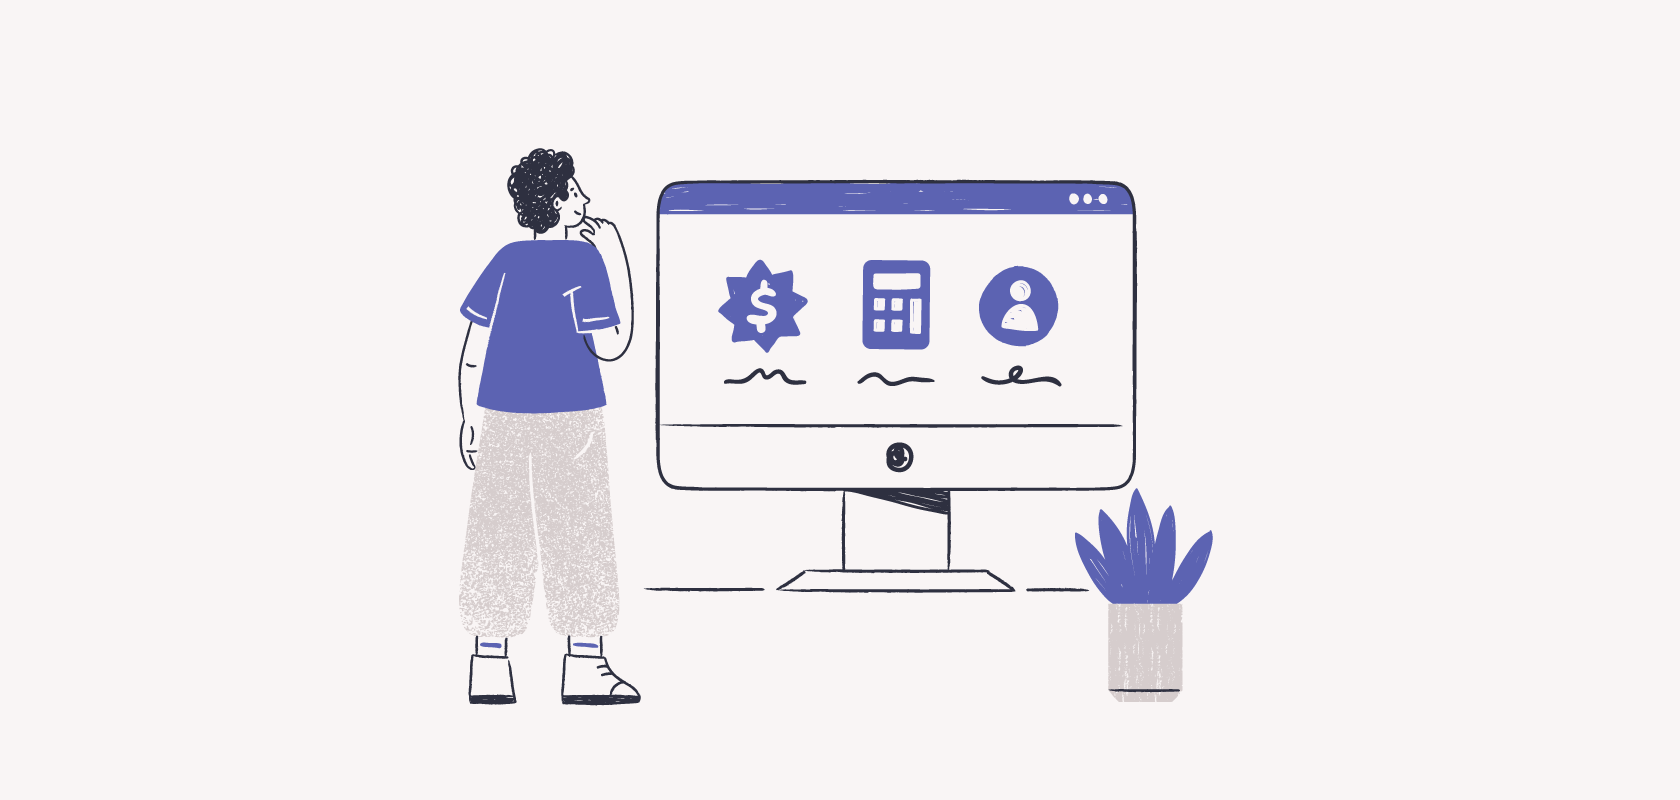
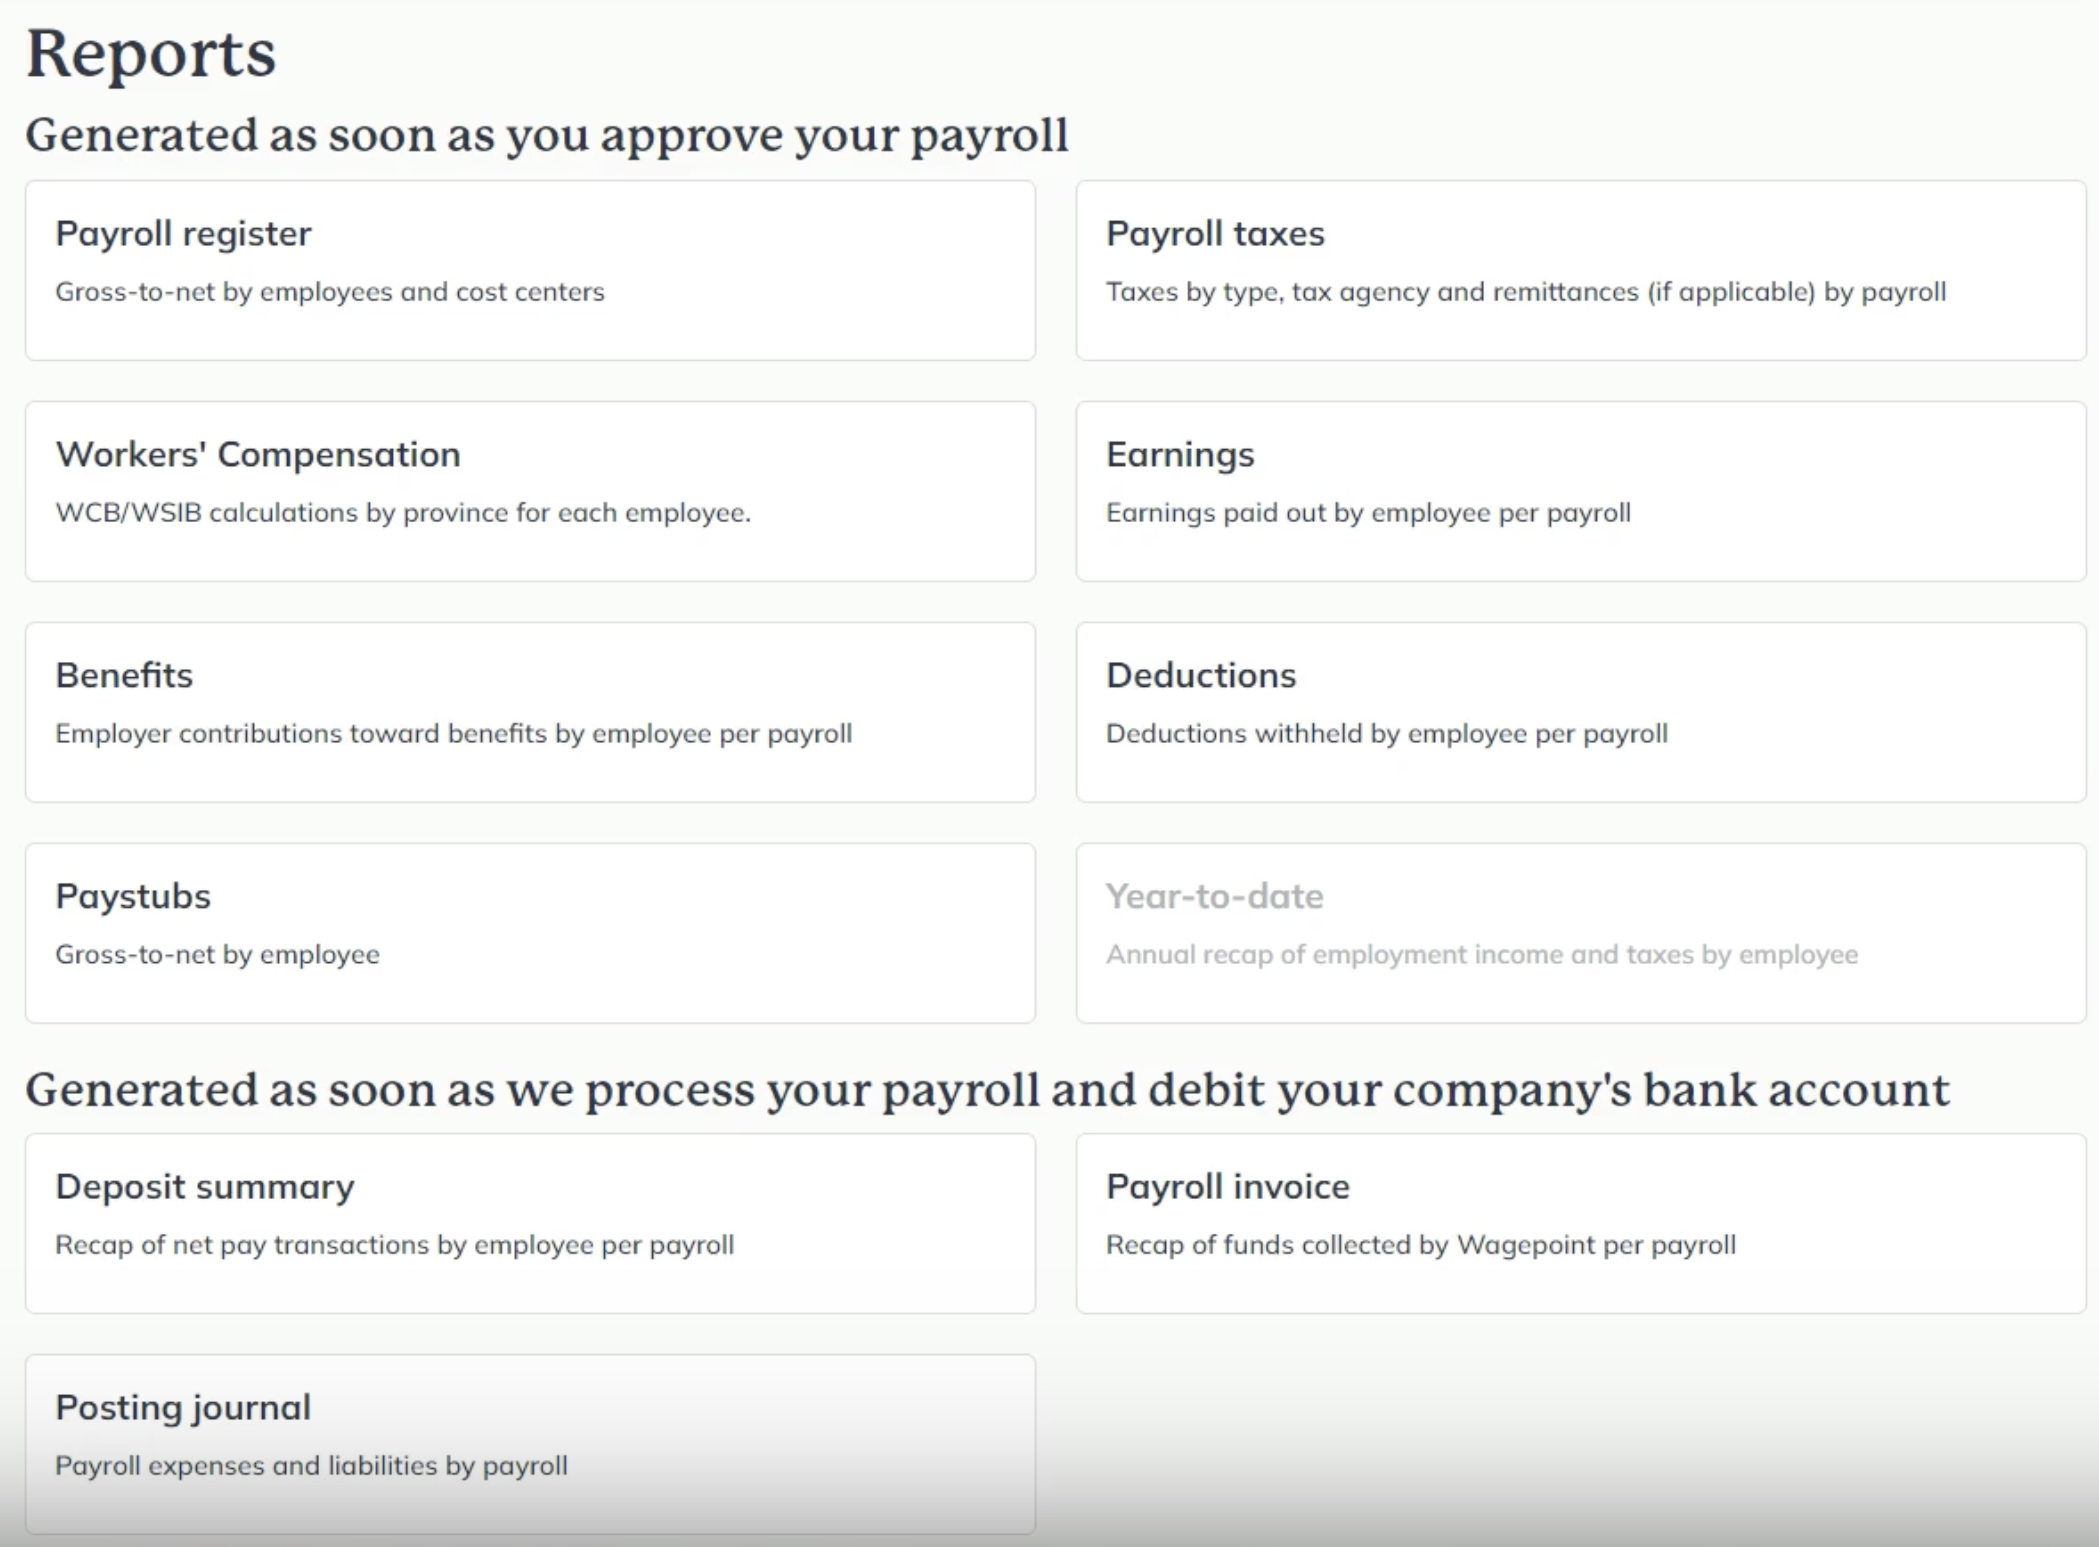
4. In-depth payroll reporting.
Comprehensive, real-time payroll reports that help you enhance your understanding of employee and business performance are a no-brainer. Whether you want to see the payroll numbers or compare them alongside your other business finances to calculate things like labour costs, cash flow and business growth, having a solid set of reports will set you up for success.
Some key details you’ll want from reports:
- Payroll costs
- Tax summaries
- Employee payment summaries
- Leave and attendance records
- Deductions (ie: Workers’ compensation, employee benefits, etc.)
Having a view of this payroll data can help with making all kinds of business decisions and make sure you’re keeping up with best practices.
5. Customization and flexibility.
The shifting tides of payroll and how we manage it means customization and flexibility are in demand. Customization will give you the chance to tackle the specific needs of your business while still taking care of more standard details like federal taxes and minimum wage.
Some of the essential features in this area include:
- Custom income and deduction types
- Multiple pay rates and pay schedules
- Custom user roles for enhanced security
- Custom reports and filters to highlight the details you need
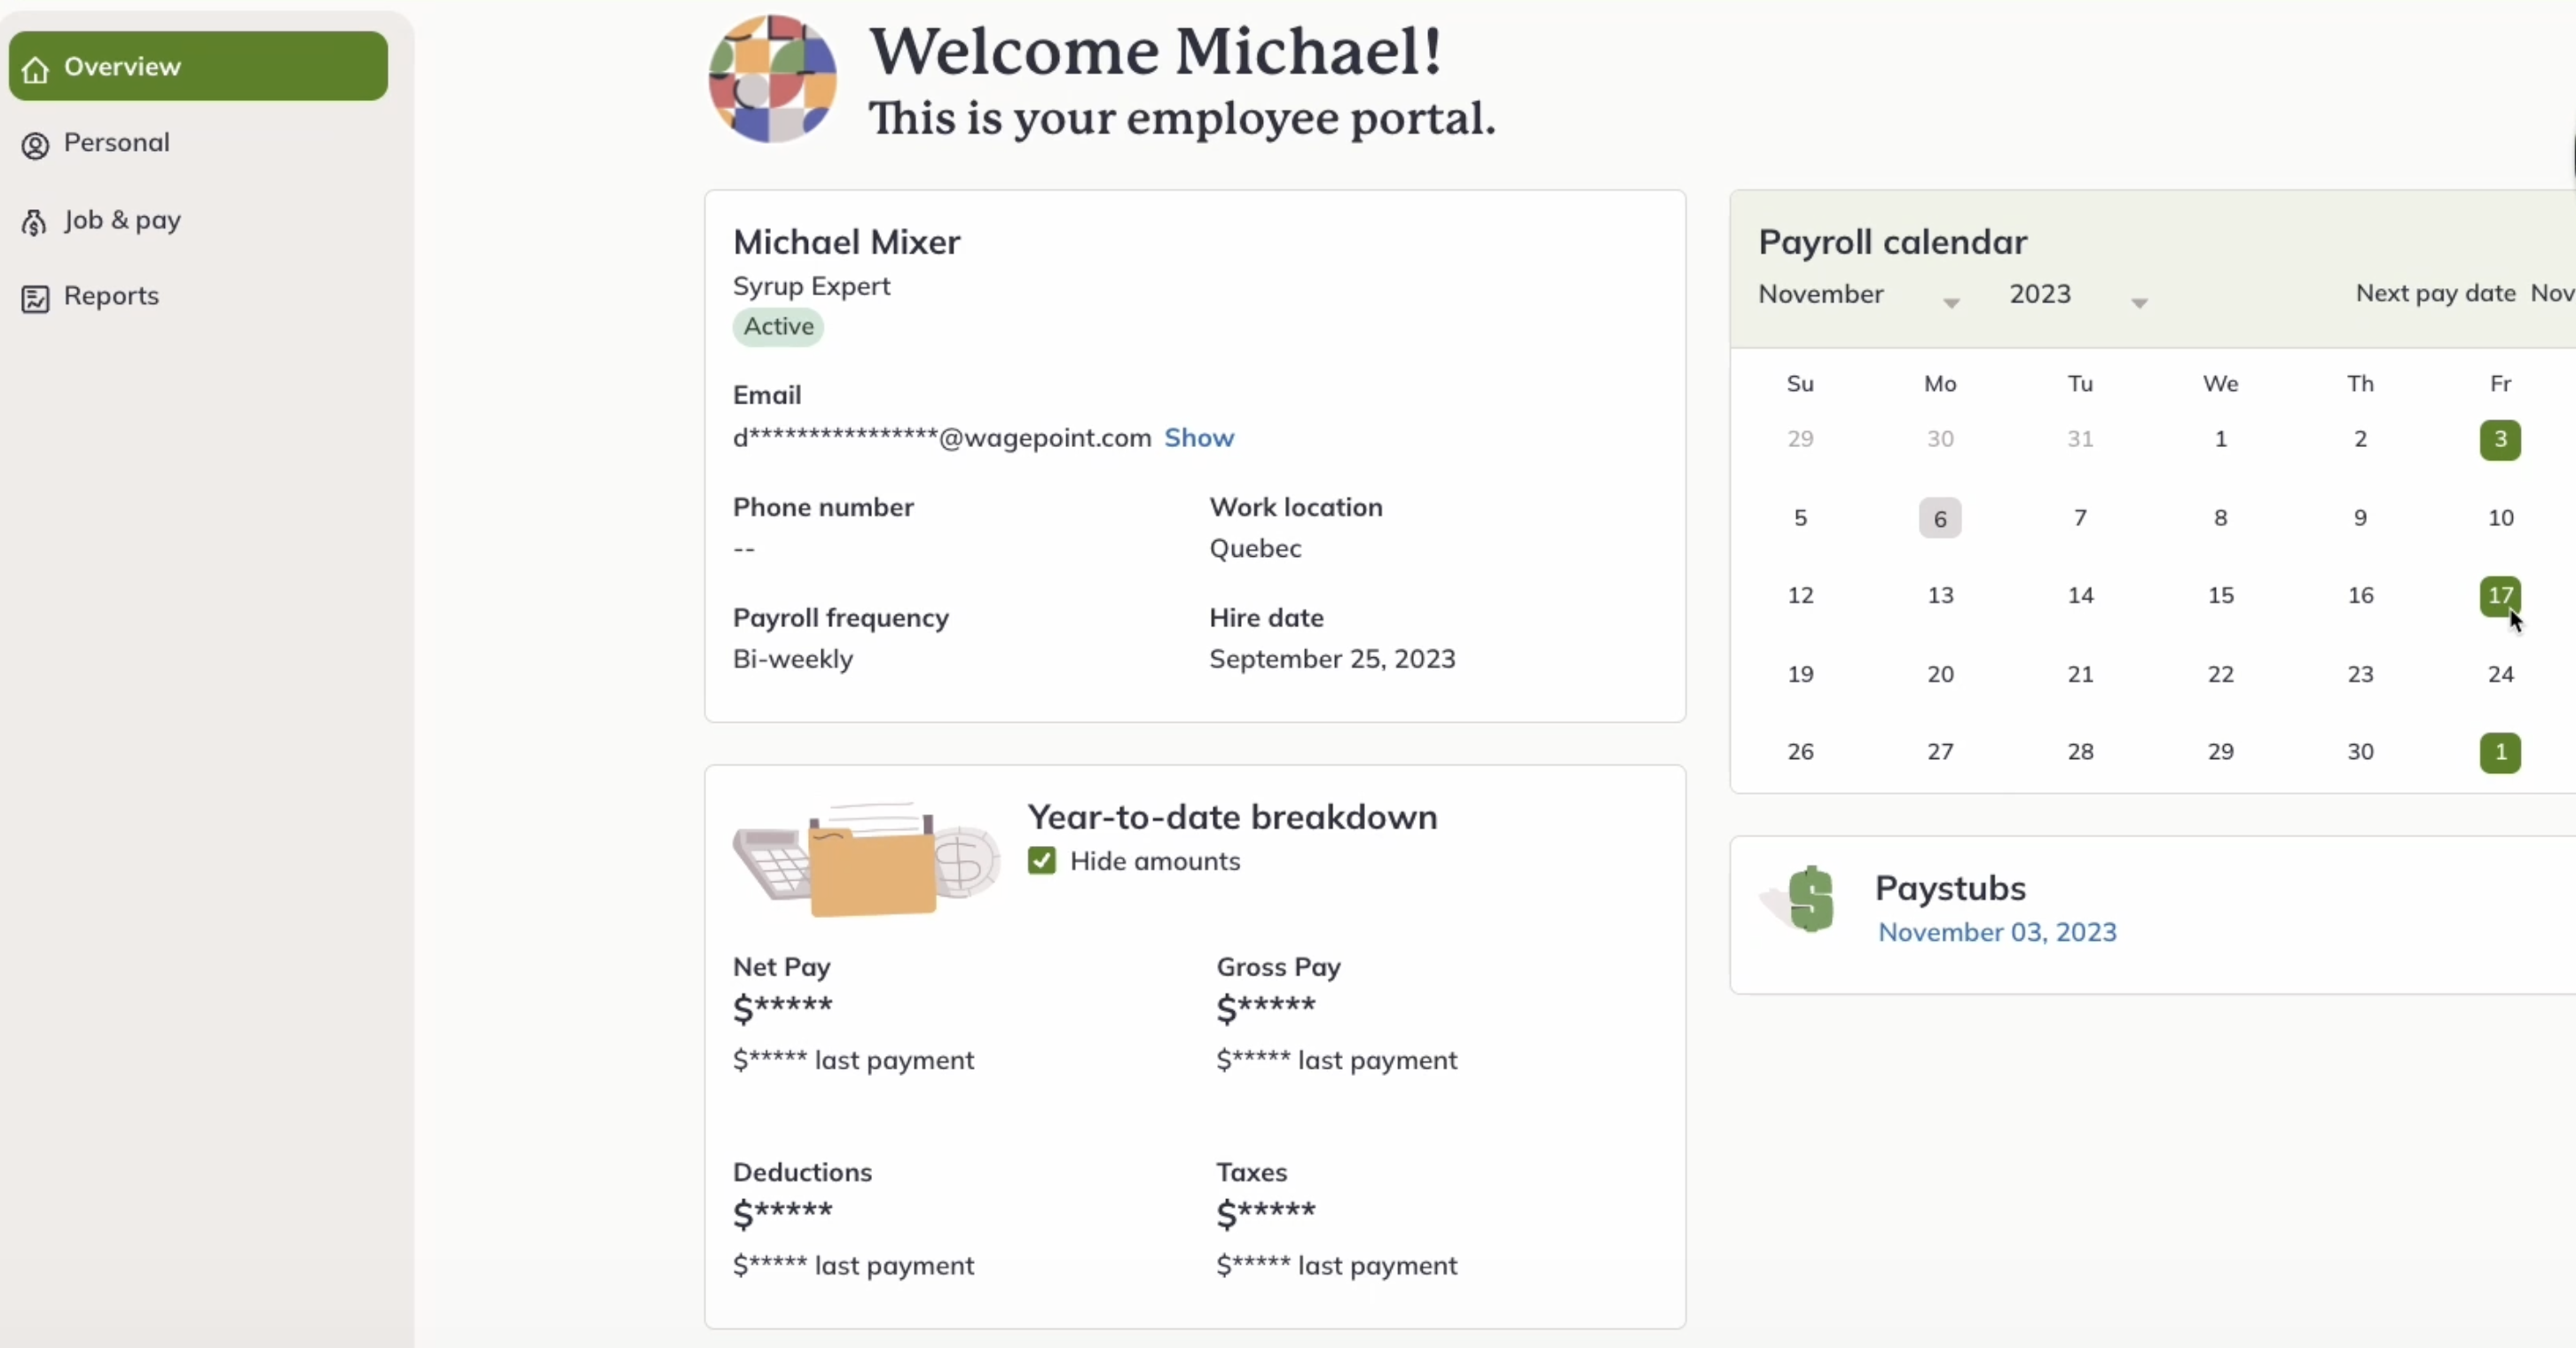
6. Employee self-service portal.
Payroll software with a self-service portal empowers employees to own and be accountable for their personal data.
This kind of online portal increases transparency, minimizes errors and increases security while saving you time. For example, they can use this easy access to review and download their pay stubs and year-end forms or update personal information and payment preferences.
This sort of mobile app or online access is great for business with teams of all sizes.
7. Security features.
Payroll security is no joke. Working with payroll means working with all kinds of sensitive information — both on the business and employee side. Social Insurance Numbers (SINs), bank accounts, tax information — that’s just the tip of the personal details iceberg you don’t want others to get their hands on.
Because of that, having advanced security capabilities is one feature area you shouldn’t skip over in your chosen software platform.
Cloud-based solutions store your data safely away from potential onsite data breaches. The best payroll systems will also have the following to protect your data:
- Industry- and bank-grade processes
- Top tier encryption
- Regular security training for all staff, from developer to customer support to marketing teams and beyond.
Plus, having an extra layer of protection on your end with something like two-factor authentication for secure access helps ensure you and your users control access to this information.
8. Integration capabilities.
When your payroll software integrates with your other business tools, you level up your workflow. Think integrating with your accounting software or time-tracking and people management tools.
You’re left with an automated system that takes streamlining processes that brings bookkeeping, payroll and human resource teams together. This way, you can share information between applications quickly and easily.
These are just a few of the many benefits of integration such software:
- Synched time entries for easy payroll processing
- Synched employee management
- Synched transactions
- Easy chart of account mapping
- No more manual data entry (meaning fewer data entry errors to worry about)
In addition to making the payroll, workforce management and bookkeeping life easier, this is also helpful if you ever have to go through an audit. You’ll have all your information in order so you can clearly show every detail.
9. Accountant or bookkeeper access.
Payroll software that gives you the chance to collaborate with an accountant or bookkeeper that offers payroll services is a great additional feature to consider.
Think about it: Instead of having to print out all your reports to send to your accountant or bookkeeper, they’ll have easy access to that data with their own login and dashboard. They can review your processing or even process payroll for you. That’s the beauty of it — you two can decide how you want to work together!
Final thoughts on payroll software features.
Automating payroll takes a lot of pressure and workload off organizations of all sizes, including small businesses. The right payroll software saves time and money, enhances efficient tracking of employee data, boosts engagement, minimizes errors and supports compliance. However, choosing a comprehensive payroll solution that meets your business’s needs is key.
Take Wagepoint’s features for a spin.
Wagepoint’s cloud-based solution was built just for small businesses to simplify payroll processing and free up their time so they can focus on growing their business or quite simply doing what they love. Here are just a few of the features you’ll love:
- Pay employees and contractors
- Automated calculations
- Direct deposit
- Payroll tax management and payments
- Customizable reports and income and deduction types
- Employee self-service portal
- Designated user roles
- Top notch security
- Time-tracking integration
- Integration with accounting software (coming soon!)
- Work with your accountant or bookkeeper
- PCP Certified customer support
Get started with Wagepoint’s 14-day free trial.
Payroll software FAQs.
Do small businesses need payroll software?
Payroll software automates payroll processing and management for small business owners so they can focus on being experts in their businesses instead of payroll. It puts the power and control of payroll in your hands while simplifying all the time-consuming processes.
What’s the difference between a payroll software and a payroll provider?
A payroll software is a self-serve option for processing payroll. A payroll provider can be someone like an accountant, bookkeeper or other service provider that handles the payroll process for you. Some payroll software companies do offer a full-service payroll option, so be sure to verify what kind of subscription you’re signing up for.
What is the Canadian equivalent of the American Payroll Association?
In Canada, we have the National Payroll Institute.